I love making big quilts! I think I like working on big quilts because I have a serious fabric addiction so the more fabric I get to handle, the better! I also like to intermix small projects into my weekly sewing to get that sense of accomplishment in completing something in a few hours start to finish.
Pillow covers are my absolute favorite thing to make because they take up little space when not being used and the cover can be changed seasonally to spruce up up any room. They are also a great scrap buster project!
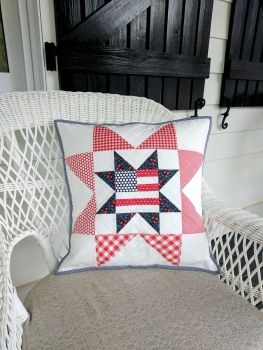
Patriotic Star Block
Finished Block Size 18″
American Flag Center
Blue – 2.75″ square
Red Stripes – (2) 1.25″ x 2.75″ and (1) 1.25″ x 5″
White Stripes – (1) 1.25″ x 2.75″ and (2) 1.25 x 5″
Middle Blue Star Points
Blue – (8) 2.75″ squares
White – (4) 2.75″ x 5″ and (4) 2.75″ squares
Red Outer Star Points
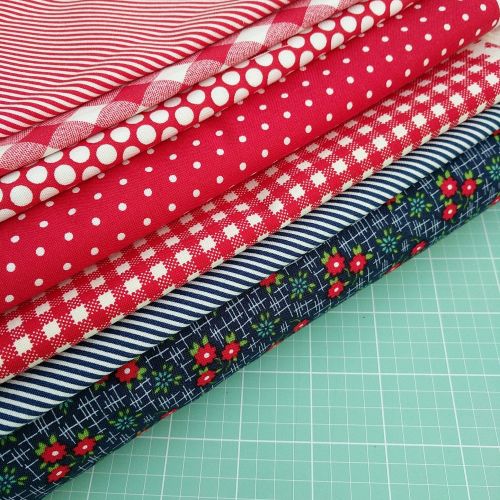
*If you choose to do scrappy star points like I did (4 different red colors), you will need 2 – 5″ squares per red fabric*
Red – (8) 5″ squares total
White – (4) 5″ x 9.5″ and (4) 5″ square
Making the American Flag Center Block
Sew the shorter (2 red and 1 white) 1.25″ x 2.75 strips together
Sew the longer (1 red and 2 white) 2.75″ x 5″ strips together
Press all seams open
Attach the shorter section to the blue 2.75″ square
Attach the longer section to the bottom
The block should measure 5″
Making the Red and Blue Star Points (Flying Geese Blocks)
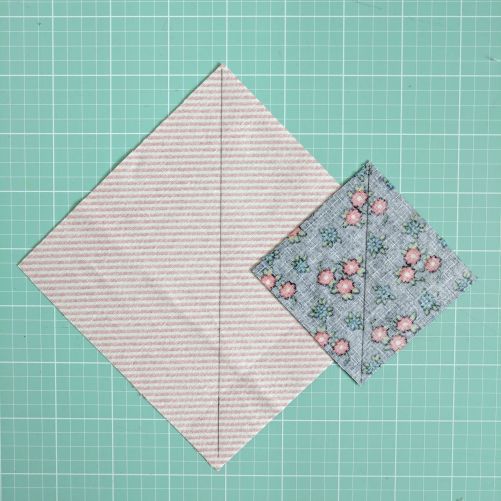
Draw a line on the back of all the blue 2.75″ and red 5″ squares
Lay a blue square on top of the white 2.75″ x 5″ rectangle. Stitch on the line, trim 1/4″ away from the line and press. Repeat the process for the red squares by laying a red 5″ square on top of the white 5″ x 9.5″ rectangle
Sew the second half of the block by placing the blue 2.75″ on top of the white rectangle, sewing on the marked line, trim and press. Repeat the process for the red 5″ squares.
Repeat the process until you have 4 blue units measuring 2.75″ x 5″ and 4 red units measuring 5″ x 9.5″
When sewing the flying geese block, I always start at the marked line that is in the center of the block and stitch outwards to the edge. If you start sewing from the edge, sometimes the fabric will get bunched up under the needleplate and not give an accurate angle
Constructing the Block
Start by taking two of the blue flying geese blocks made previously and sewing a 2.75″ square to both sides of the flying geese units
Repeat the process for two of the red flying geese blocks by taking a 5″ white square and sewing it to the end of the blocks.
Sew a blue flying geese unit to both sides of the American Flag block
Sew the blue flying geese units with added white squares to the ends to the top and bottom of the block
Block will measure 9.5″ square
Sew the red flying geese units to the sides of the block
Finish by sewing the red flying geese units that the white square was added to the ends, to the top and bottom of the block
Block will measure 18.5″ square
You can finish this block to make it a pillow cover using a zipper or envelope backing enclosure. I have already started a quilt using this block with a fun sashing technique that I hope to share with you very soon!
I hope you enjoyed my first tutorial! There are a lot more to come 🙂 Happy Monday to all and have a great week!
What a great tutorial. You were very clear in your directions. And I love the patriotic look of these wonderful pillow covers. Thanks for sharing with us. I am hoping to get to making a couple of these this weekend.
Hi, Sara, what a comprehensive tutorial! I’m wondering if it would be OK with you if I used your design for a quilting bee that I’m participating in. I would of course give you credit and link back to your site
Sara, Love your beautiful pillow covers. Thank you for the tutorial and continue sewing!!! Please let us know when you publish a book, your directions are fabulous.


May 22, 2017 at 7:07 pm
Thank you for the tutorial! Off to pull my fabrics.
LikeLike
May 28, 2017 at 2:42 am
I hope you enjoy making it! I love projects that can use up some of my scraps
LikeLike
May 23, 2017 at 6:59 pm
Such a cute project. Thanks for sharing this very thorough and easy to understand tutorial.
LikeLike
May 28, 2017 at 2:43 am
You are very welcome Jeanna! I hope you enjoy making this pillow cover!
LikeLike
May 24, 2017 at 11:15 pm
Love it! Thanks for this wonderful tutorial. Will be making it soon!
LikeLike
May 28, 2017 at 2:41 am
Hope you enjoy making it! It is such a fun project that can be displayed for so many holidays!
LikeLike
June 1, 2017 at 2:01 pm
Awesome gift to us–great tutorial and love my pillow cover. Just waiting for the pillow form I ordered! Thank you!
LikeLike
June 9, 2017 at 10:52 am
What a great tutorial. You were very clear in your directions. And I love the patriotic look of these wonderful pillow covers. Thanks for sharing with us. I am hoping to get to making a couple of these this weekend.
LikeLike
June 13, 2017 at 11:51 pm
Hi, Sara, what a comprehensive tutorial! I’m wondering if it would be OK with you if I used your design for a quilting bee that I’m participating in. I would of course give you credit and link back to your site
LikeLike
June 17, 2017 at 9:44 pm
Thanks for the tutorial!
LikeLike
July 2, 2017 at 11:36 pm
Very cute block–thanks for the tuturial!
LikeLike
July 4, 2017 at 6:27 pm
Love it! Thank you so much!
LikeLike
Pingback: Patriotic Stars Quilt | Sewing Seams
July 5, 2017 at 7:43 pm
What an awesome tutorial…just love the pillow❤️ Thank you!
LikeLike
July 11, 2017 at 1:15 pm
very good tutorial with just the right amount of pictures too. Thank you
LikeLike
Pingback: July’s Gridster Bee Block | OccasionalPiece--Quilt!
August 13, 2017 at 12:19 am
Sara, Love your beautiful pillow covers. Thank you for the tutorial and continue sewing!!! Please let us know when you publish a book, your directions are fabulous.
LikeLike
Pingback: Solar Eclipse Block • 2017 | OccasionalPiece--Quilt!
Pingback: 50+ 4th of July Sewing Projects + DIY Patriotic Patterns
June 18, 2020 at 1:54 pm
So beautiful, great instructions! Thank you.
LikeLike
June 29, 2021 at 10:26 pm
What size are the stars. I like using paper piecing.
LikeLike
Pingback: Friday Funday! Free Quilted Patriotic Pillow Patterns! – Quilt Therapy